Thursday, March 28, 2013

Gear Review: Solo Stove

Solo Stove
Cooking with the Solo Stove

I find the idea of a wood burning stove very appealing. Maybe because it feels like it brings me closer to the wilderness travelers of yesteryear, cooking as they did... I think fire in general can conjure up those primal feelings in people, and in a way, that's also why we hike. To connect not only with nature, but our past as well. 

You can bet this nostalgic affection for fire played a part in my impulse purchase of the Solo Stove a couple months back. The notion of cooking over an open flame compelled it. I pictured myself, not just a backpacker, but a mountain man... I know, that's really stretching it, but I'm feeling very romantic as I write this.

The stainless steel Solo Stove (according to Solo Stove) is a "natural convection inverted downgas gasifier stove". The double wall design "channels" air through the intakes at the bottom to the fire box, and sends warm air up between the walls, and out smaller holes on the top, and back into the fire box. I know, it all sounds very technical for a wood stove, but what it all means is that it burns and heats very efficiently. 

The Solo Stove is two pieces, the stove, and a removable cooking ring. The ring flips upside-down and fits inside the stove for easy storage. The whole thing is very solid, and seems to be built really well, all thanks to what Solo Stove calls "one piece construction". Which basically means that the stove is built from a very few solid pieces of stainless steel, with the smallest amount of welds and seams as possible. It makes for a very durable piece of equipment.

For a stove, I guess you could say that its big when compared to a canister or alcohol stove, but keep in mind, with the Solo Stove you don't need to carry fuel. That was a big selling point for me. The idea that I not only don't need to carry fuel, but I don't have to worry about running out of fuel either. The Solo Stove will burn just about anything too, especially after its lit. A lot of my hiking is done in the Sonoran Desert here in Arizona, and I found that cactus wood burned just as well as wood from a tree. The firebox in the Solo Stove gets so hot, that just about anything that fits inside will burn.

The Solo Stove is supposedly designed to fit in most cook pots for easy storage. Since I only own one pot, my Solo Stove rode in my GSI Pinnacle Soloist pot, and it was a perfect fit. Although I would recommend against using this pot, as the large flames from the Solo Stove has the potential to melt the plastic lid and rubber coated handle of the Pinnacle Soloist pot. What I did was just adjust the position of the pot on the stove if I saw a flame getting too close. I didn't have any melting, but the orange rubber coating on the handle did turn black in places.

Firing up the Solo Stove is really easy. First, collect some wood and/or other organic materials from around your camp. You need a lot less than you think. To start it, I found the best way is to take off the cooking ring, place a layer of small sticks on the grate, and place your tinder on the sticks. Once the tinder is lit, put the cooking ring back on, and start feeding it smaller sticks. If you have fire building experience, this process will be quick and easy. Once you have a good flame, place your pot on the cooking ring. From here on out, its just a matter of feeding the stove to reach a boil, but you have to pay attention. The Solo Stove is not a stove you can light and walk away from. It needs to be fed. The firebox gets so hot, that neglecting the stove even for a couple of minutes can result in the fire going out because the wood inside has burned up. At the opposite end, overfeeding the stove can smother it, but once you have it figured out, keeping the fire burning is easy. My first use with the Solo Stove, I reached a boil in 5 minutes. I have cooked for 2 with no problem, and have sustained a boil easily for 15 minutes... All using fuel that I found on the forest floor. 

That is really the best thing about this stove. Its easy. Its simple. Its minimalist.  No mechanical, or electrical parts. No gas lines or fuel cans. In short, nothing that could fail, because as Murphy's Law states, "what can go wrong, will go wrong", and when you're in camp after a long day on the trail, you want your stove to work.

Not that everything is perfect with the Solo Stove. For starters, its relatively heavy at 9 ounces. For me, the weight is fine, but for the ultralight crowd, its probably too heavy. Clean-up can be a pain too. You'll have soot build up at the bottom of your pot that will need to be cleaned before you pack up (unless you want soot in your pack). I would recommend carrying a small camp towel for this purpose. Since its an open flame, you wont be able to use it in some places (like Glacier National Park for example) that don't allows fires in the backcountry. There may be some places in the backcountry where you just cant find any fuel. I don't know where those places are, but I'm sure they exist. Finally, in a very wet environment  you will probably have difficulty with this stove just like you would building a fire. To what extent I don't know, since all my tests were in dry conditions (I live the desert remember?).

Overall this as badass little stove. Its easy, simple, efficient, and fun to use, and will work excellent for your backcountry cooking needs.


Solo Stove
Solo Stove set-up. You need a pile of small sticks... And notice no smoke coming from the stove.

Monday, March 25, 2013

Cave Creek Colors

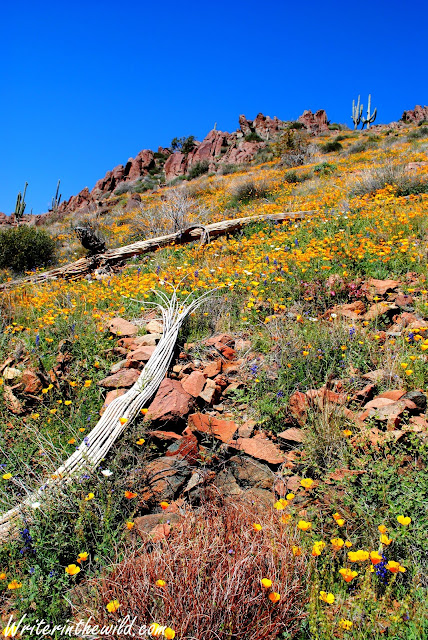
I have decided Spring time must be the best time for desert hiking. I've hiked along Cave Creek between Seven Springs and Spur Cross before, and frankly there isn't much color to see; just a dead sea of drab. But in the Spring everything is different... Everything is growing... The flowers are blooming. The sea of drab is now a variety of browns and greens, and the California Poppy has painted the hillsides gold. It is a beautiful sight indeed.

Climbing into the Cave Creek trail system.

We started on the Skunk Tank trail with a little climbing. A slight breeze kept the scorching sun at bay. Not that we have reached summer temps yet, but just hiking under direct sunlight minus any shade can be tough (at least for a north-man like myself). But the wind was nice, and we made short work of the climbs. My new friend Dave Creech (aka Wilderness Dave) came along for the trip, and I had a fun time picking his brain. The talk was mostly about blogging and photography, and It made for some really cool conversation.


Skunk Tank Trail
Enter the poppies

Things turned serious really quick when we hit the poppy fields. The wildflowers were everywhere, and they turned the hills gold. It made for some excellent photo opportunities.


Covered in poppies 

Golden hills near Cave Creek

Eventually, after a little backtracking, we found a camp for the night. It was a pretty grass-covered spot on the banks of Cave Creek. The water was clear and blue and delicious, and it was surrounded by gold-painted poppy-covered hills. It was all very beautiful. 


Cave Creek
Cave Creek camp

Opposite direction view of Cave Creek near our camp.
It was an excellent, but short trip. I am always grateful to get out backpacking, even if its only an overnighter. The wildflowers really add a whole new dimension to desert hiking, and I encourage everyone to get out right now and enjoy them while they are in full bloom. They truly are a beautiful sight, and my photos don't really do the scene justice.

I tried out the Sawyer squeeze filter for the first time. It worked as advertised, but I haven't developed an overall opinion yet, so keep an eye out for the review sometime down the road.

Also used the Solo Stove again. Worked awesome. I'll have a review for it later this week.

 One last note, I did manage to slip on a rock and fall in the creek during one of our many crossings on the way out Sunday. I kept my feet underneath me, so I only got wet up to the knees, but it could have been disastrous, as I had my Nikon on my hip, in the camera bag, with the lid ajar for easy access.

Monday, March 18, 2013

Gear Review: M-Rock Yellowstone Camera Bag

M-Rock Yellowstone
M-Rock Yellowstone


Somewhere along the line I decided I needed to lug a dSLR into the backcountry with me. My old point-and-shoot wasn't cutting the mustard. I would return from a backpacking trip and upload a bunch of crappy photos that I wasn't happy with. I needed a camera that would capture what I was looking at as accurately as possible. Enter the Nikon d3000. I took some shots around the house. I bought "Nikon d3000 for Dummies". I was determined to haul it with me, but I didn't know how. Its big, bulky, heavy, and fragile, and not very conducive to backcountry travel. After a trip to REI I returned home with the M-Rock Yellowstone camera bag.

This camera bag is the perfect size for my Nikon, with an attached 18-55mm lens, but it doesn't leave much room for anything else. The camera fits securely upside-down in the bag. It would probably fit a slightly bigger lens, say a 55-200mm, but anything bigger than that would be pushing it. It has pockets on top and in front, that I usually carry a few cleaning supplies in. I usually carry a small plastic bag folded up at the bottom of the camera bag to cover the camera in case it rains. Although it does come with an attached stuff sack, I found it pretty much worthless.

My biggest challenge initially was figuring out the best way to carry the bag. It comes with two shoulder straps, and there are six different ringlets on the bag to hook the straps to for a variety of configurations. Eventually I found that the most efficient method is to hang the bag across my body over one shoulder. For stability I buckled the belt of my backpack over the top of the camera bag strap. This way the camera hung at my hip like a six-shooter, and was easy to draw if I needed it fast.


On my hip, lid propped open.


As easy as it is to reach the camera, carrying the bag this way did come with some challenges. First, the way the bag is designed the lid opens from back to front (see above photo). The zipper is stiff, and with the camera pressed against my body, its nearly impossible to open. What I had to do was just leave the zipper unzipped (unless its raining). There is a buckle on top that will still securely fasten the lid, and its much easier to open then fighting the zipper. The other problem I have, is that over time the shoulder strap will hurt my shoulder. I found that the only way to deal with this problem is to switch shoulders every couple hours.

 With this configuration I used the M-Rock Yellowstone to carry my Nikon into the backcountry for the next  3 years. Over time I really developed a love/hate relationship with it. The constant pressure on my carrying shoulder can be a huge annoyance, especially on long days. Also, the carabiners on the ends of the strap are complete junk. At least a dozen times since I've been using this bag, a carabiner has mysteriously worked its way open. Imagine my surprise as I'm walking down the trail, and all of the sudden my camera bag falls in the dirt. It happens way too often, but also brings me to the best thing about this bag...

It protects the camera. Its been rained on, snowed on, and dropped countless times over the years, and the camera has always remained unscathed inside. If protection is your primary concern when buying a camera bag for hiking and backpacking, then definitely consider the M-Rock Yellowstone. Although the bag is not water proof, it is water resistant, and has protected my camera in sustained rain. I cant convey enough how much of a beating this bag has taken over the years, and it shows. Threads are pulling out everywhere. The zipper is coming apart. The material in the back is disintegrating. But it still works, and I still use it.

M-Rock Yellowstone
Takes a licking.


Overall this bag has served its purpose. Its near bomb proof and will keep your camera safe. The problem is that some of the components are cheap, and the bag itself isn't comfortable to carry with a backpack.


Tuesday, March 12, 2013

Bartlett Lake

I was able to get out camping again this week, and I had a really great time thanks to beautiful scenery and excellent company. We camped right on the beach in this little cove on Bartlett Lake, and for the most part we had the place to ourselves. The lake is ringed by some really cool green rock formations, and surrounded by brown mountains and giant saguaros. 

Water level was high. Notice the fire ring?
This trip was all about fishing. So far my Arizona fishing experience has resulted in zero catches, but this time I managed to reel in at least one bass. It was small, and I threw it back, but it was better than nothing that's for sure. It was really cool camping on the beach  because we could just fish from our camp. 

Bartlett Lake
James trying to land a lunker.
 We did see plenty of wildlife. Lots of lizards and turkey vultures, a hawk, a great blue heron, and a couple roadrunners that boogied by our camp. Unfortunately most were too far away to get a good shot with my current lens.

Roadrunner
Roadrunner

Hitchhiker
Overall it was a really fun trip, but I wished I could have stayed out a bit longer, and I wish I would have caught more fish, but its just being out there that is the most important thing for me. I'm already thinking about my next destination. 


Snow on the distant peaks.

Monday, March 4, 2013

Sonoran Spring

It seems Spring has arrived to the desert. I've never seen more color on the trail then I have in the last couple weeks. The landscape actually looks green! 

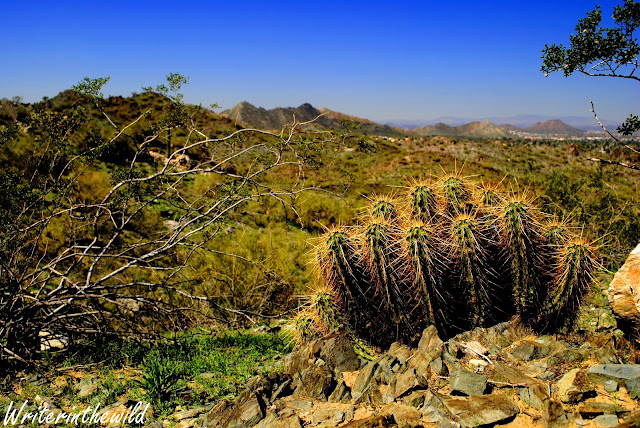
Engelmann's Hedgehog
Engelmann's Hedgehog cactus.

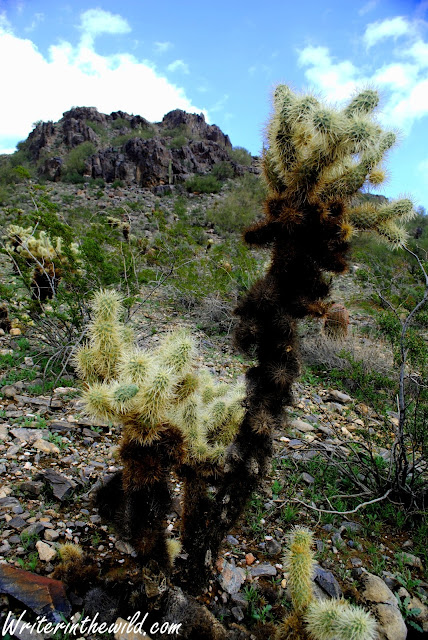
Teddybear Cholla
Teddybear Cholla
 I don't know why this Cholla is called "Teddybear". You definitely would not want to hug this cactus.

Paloverde
Paloverde 

Giant Saguaro
Giant Saguaro

Pretty sure this is some kind of Cholla.