Showing posts with label survival. Show all posts

Sunday, August 28, 2016

Budget Gear Review: Buck Selkirk Knife


Buck Selkirk
 The Dirt:

Buck Selkirk Knife

What is it? Fixed blade Survival/Bushcraft knife

Comes with: Sheath and ferrocerium rod with attached whistle

Size: Blade length 4.625". Overall length 9.5". Thickness 0.135"

Weight: 7.6 oz.

Materials: 420 HC Stainless Steel. Micarta handle. 

Price: $43.78 at Amazon.com

The Selkirk is a mid-duty fixed-blade survival knife named after one of my favorite places in the world, the Selkirk mountains of the Idaho panhandle. Not coincidentally, north Idaho is also home to the famous Buck Knife factory, where most of Buck's beloved knives are made. The Selkirk is not one of those knives. In fact, the name "China" is stamped on the blade. Some people won't consider the Selkirk for this reason alone. Despite its country of origin, the Selkirk is a solid knife that should warrant consideration when shopping for a bushcraft style knife under fifty dollars.

The knife's weight is the first thing I noticed. Previously I was almost exclusively using a Mora Companion. The Selkirk is heavy, and not particularly well balanced, owing to the steel-filled handle. The hammer on the pommel takes some of the blame for all that weight. It looks cool, but I found it not as practical for hammering as say a rock or heavy bit of wood. Though it certainly adds to the overall robust nature of the knife.

Hammer time.
Speaking of the handle, the textured Micarta has a nice wood-grain look, but feels a little too slick for my liking. Despite this, the grip is mostly comfortable. I say "mostly" because although the shape is fine, the spine isn't quite flush with the micarta. The result is an uncomfortable contact of skin and steel when I'm using certain grips or performing certain tasks. You can see in the photo below (and above) that the spine is raised just slightly above the micarta along the handle. It doesn't affect how I handle the knife. It's simply an annoyance. Call it nitpicking, but to me it shows a lack of attention to detail on the part of the manufacturer. 

Spine not flush.
Enough about the handle. Let's talk about the blade. That's where this knife really shines. Out of the box the Selkirk was shaving sharp. The edge retention is great and so is the ease of sharpening. In fact, the Selkirk is one of the easiest knives I have ever sharpened. It doesn't take much with a fine stone to hone the blade back to bad-assery. Credit the flat grind and 420 high carbon stainless steel. A lot of people knock Buck for using 420, but I have been continually impressed by the razor's edge of this knife. That said, I did roll the edge near the tip several months ago. I'm not sure what I was doing when it happened because I didn't notice it until I was cleaning my knife at the end of the day.

Feather stick
Deformed

Let's not forget that the Selkirk is billed as a bushcraft knife. As far as carving, chopping, batoning and food prep, the knife performs exceptionally. The problem comes with the fire starting capabilities. The accompanied ferro rod is small, but it has to be. The rod is designed to be used in the choil of the knife, rather than the spine. To me, this is a total design flaw. For starters, the space to work with is tiny. Worse, you have to work your hand under the business end of the blade, which just increases the likelihood of an accident. Finally, if you prefer a larger rod, chances are it won't fit the tight opening of the choil. Now, the spine of the knife is not 90 degrees, but the angle is such that you can produce a small amount of sparks. Of course, you could always grind it flat on your own, but why Buck wouldn't do that in the first place is just silly.

Ferro rod is designed to go through the choil.

Finally the sheath. On other sites I've seen people knock the injection-molded sheath, but I think it's one of the stronger features of the Selkirk. It looks good, can be configured for a variety of carries, and holds both the knife and the ferro rod securely. Plus, like the knife itself, it can really take a beating. 


Overall, the Selkirk is worth considering for casual knife users, or buyers on a budget, especially if you're willing to modify the spine. Although rough around the edges, the blade is excellent, and you can count on the durability. Design flaws and sloppy manufacturing may deter some. If money isn't a concern, look elsewhere.

Wednesday, August 20, 2014

Gear Review: Purinize Water Purifier Solution

Nalgene Canteen
Purinize 2oz. Bottle

Purinize Water Purifier Solution is an all-natural water purifier using an “all mineral salt solution”. What makes this product unique among water purifiers is the ingredients, which are simply 2% sulfate mineral salts; 98% purified water. When I first received this product and read that suspect ingredient list, my first question was: How does that work? Before I even began testing this stuff, I had to do my research. The answers I found are a bit murky.

According to Purinize, water purification occurs in a four step process.

1. FLOCCULATION. when Purinize is added to water, it causes dissolved, invisible impurities, like dirt, organic waste, and micro-organisms to come out of suspension and agglutinate or clump together.

2. AGGLUTINATION: The process of agglutination (clumping) occurs where impurities are neutralized as they clump together becoming insoluble. 

3. PRECIPITATION: Once agglutinated, the insoluble, neutralized impurities solidify as they precipitate out of solution becoming filterable.

4. DEPOSITION: The precipitates settle, becoming sediment at the bottom of your water container. At this point your can either, filter and/or scoop, or pour the purified water.

If you read those steps closely, you might take away two key points. The first is that water is purified by clumping the impurities together so that they “become filterable”. The second is that the clumped impurities become “neutralized“, and settle as sediment at the bottom of your container”. The trick is then separating the sediment from the water, which Purinize recommends using a .1 micron or smaller filter. Indeed, my small 2 oz. bottle of Purinize was sent to me with a Sawyer Mini Water Filter for this purpose. But I couldn't help but wonder: If I had a filter, why would I need Purinize? 

The top water filters sold for backcountry use in the United States are perfectly adequate for removing any harmful bacteria one might encounter in North America. Hikers have used filters like the trusty Katadyn Hiker Pro for years. As great as filters are however, they do not actually purify water. Let me repeat that just in case you think I made a typo. Water filters do not purify water. To do so, they would also need to filter out viruses, which are just too miniscule for nearly all filters. That is where a water purifier comes in. Any product claiming to “purify” water, must “destroy 99.9999% of bacteria, 99.99% of viruses and 99.9% of protozoa”. 

Purinize posts the results of independent lab testing on their website to validate their purification claims. They list a whole host of waterborne pathogens it eliminates or reduces, including some viruses. Incredibly, it also claims to be 99.95% effective at reducing chemicals, pesticides, pharmaceuticals, disinfectants, and heavy metals. The problem with the lab testing however is that “all tests were conducted using a 0.2 micron” filter. I say “problem” because a .2 micron filter would reduce many of the pathogens, pesticides, and chemicals on its own.

Now we reach the crux of my problem. How do I safely test a water purifier whose effectiveness I am not convinced of, and whose failure may seriously impact my physical wellbeing? The answer, of course, was to follow the instructions sent to me by Purinize to the letter. 

For my testing, I always paired the Purinize with a filter. I just couldn't get over the fact that the lab tests were also done with a filter. On their website, Purinize claims that it “will disinfect and clarify virtually any fresh water source within minutes…” All you have to do is “add the suggested amount of Purinize to your water. Mix well and wait a few minutes before consumption.” They do recommend however that a filter be used before drinking for the “removal of agglutinated particulates.” So that is what I did. I never tested this product alone without a filter.

I tested Purinize on a variety of water sources. My first test was at a Willow Springs Lake on the Mogollon Rim in Arizona. The lake was very low and extremely muddy due to persistent drought conditions in the region. For this first test, I involved the entire family. I treated a gallon of lake water with Purinize, waited about 10 minutes, and filtered with a Katadyn Hiker Pro. The end result was crystal clear water that tasted pretty good. I shared the water with my family, mainly because of the trust I had with the Katadyn Hiker Pro. All of them agreed the water was good. We all drank plenty and none of us got sick. The test results however were inconclusive, because using the Katadyn Hiker Pro would have made the water safe anyway.

Taking the advice of Purinize, I decided to treat a bottle of tap water, and leave it overnight. To treat, you simply add 15 drops per liter of water. After 24 hours I checked on my bottle of water, and sure enough, at the bottom was a pile of clumped impurities that sort of resembled a yellow goop. When I drank the water (with a filter) I didn't notice any discernable difference in the taste. I tried this same experiment with several water sources, all with the same result. Perhaps the most revealing test I conducted was with green algae-filled swimming pool water. After waiting 24 hours the green water was crystal clear, except for the yellow goop floating around near the bottom. Admittedly, I was a bit hesitant drinking this water because of its original appearance, but using a Sawyer filter, it tasted fine and I didn't get sick.

Purinize is a tough nut to crack for a gear tester. Although I can physically see sediment clump together and sink to the bottom, I don’t know for certain if the water itself is actually purified because I lack a proper laboratory and the scientific knowhow. Since all the treated water is ran through a filter, it’s tough to tell which method is making the water safe to drink; the Purinize, or the filter? The only way to find that out, is to just use Purinize alone (and skip the filter) on water I know will contain pathogens or chemicals that will make me sick. But I’m just too scared to try.

My conclusion is that Purinize would be an unnecessary redundancy for backpacking use in North America. If you are overly concerned about a particular water source I would consider Purinize as a pre-filter treatment option. The best use for Purinize in my view is for emergency water treatment or long term water storage in an “off the grid” scenario. If you are collecting water for storage purposes from potentially unsafe sources, I can see Purinize working well to clump possible impurities together in storage to assist in the filtration process later on. Furthermore, lacking any expiration date, Purinize could benefit from a long shelf life as long as it’s properly stored. This shelf life makes Purinize an option for preparing for future fresh water shortages due to a rising population, global warming, and man-made pollutants.


Disclosure of Material Connection: I received a 2 oz. bottle of Purinize Water Purification for free from Purinize Advanced Water Technologies as coordinated by Deep Creek Public Relations in consideration for review publication.

Tuesday, January 28, 2014

Leather Sheath for Mora Knives

Leather sheath for Mora Knives from Self Reliance Outfitters
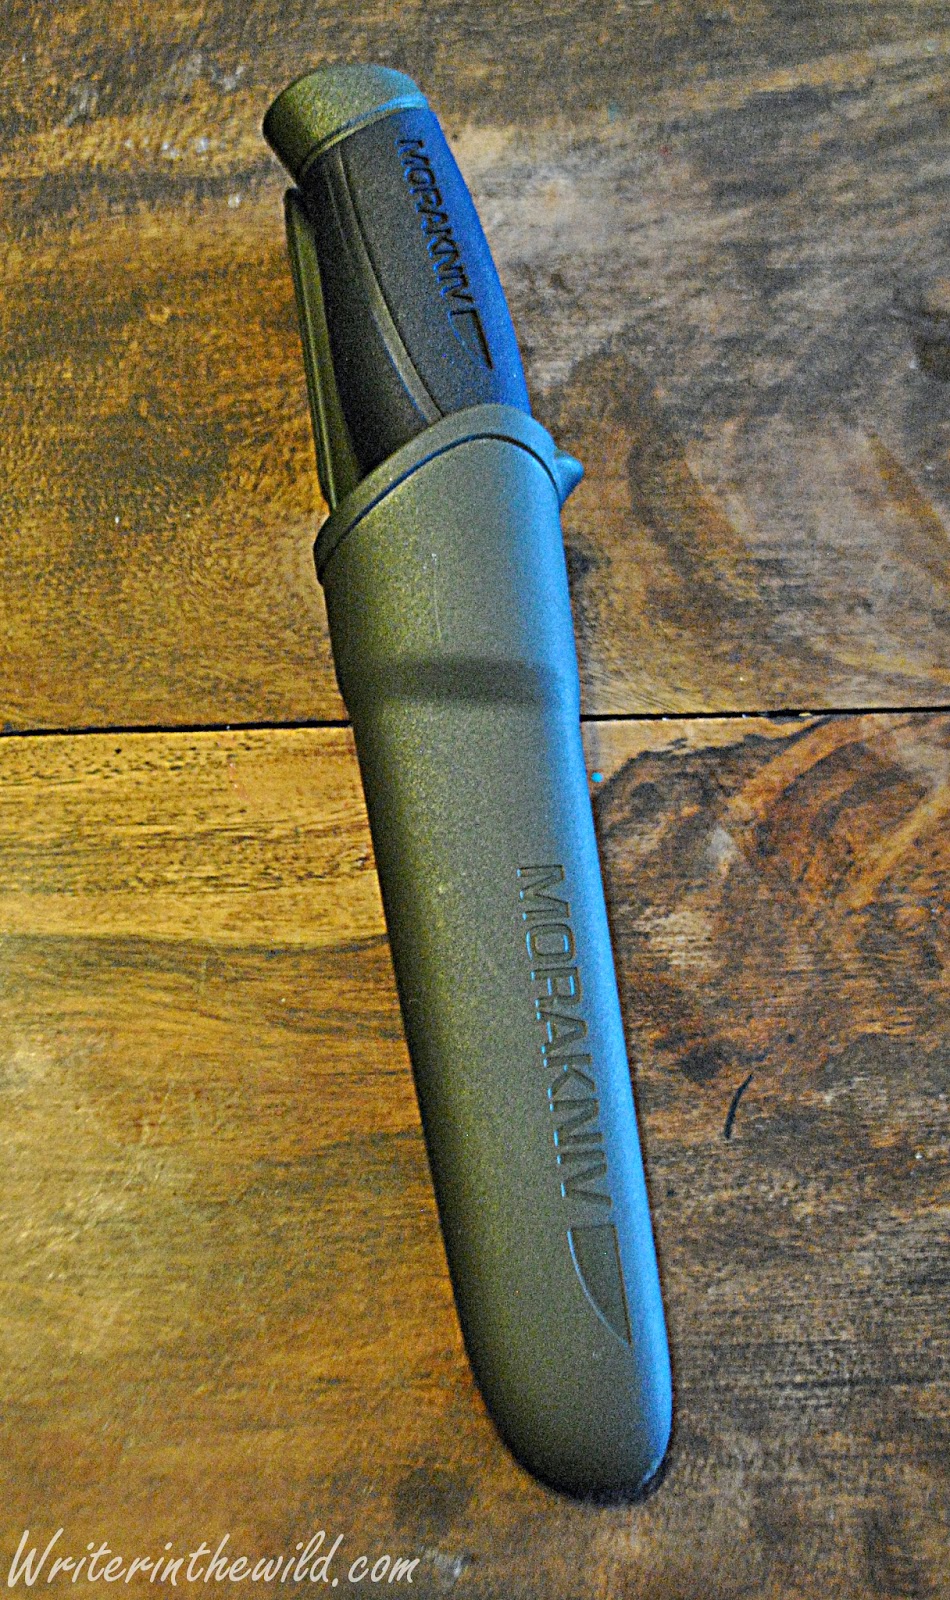
A few months ago I purchased my first ever Mora knife. As some of you may know, Mora knives are extremely popular in the bushcraft/survival community mainly because they are razor sharp, hold an edge well, and are easy to sharpen in the field. These knives are also very inexpensive compared to what we (or at least I) normally think of as top shelf knives. For example, my 4.1 inch carbon steel fixed blade Mora Companion (shown below) was purchased on Amazon.com for around $14. My last knife purchase before then was a small stainless steel Benchmade 530 folding knife that I paid around $100 for. So the Mora knives are great quality knives, and super inexpensive compared to other brands, and that is undoubtedly another reason why people love them so much.

The problem with Mora knives is the sheath they come with. I've purchased two so far, and both of them came with a real cheapo looking plastic injection molded sheath. Functionality wise, the plastic sheath's work just fine, but to me they just seem... well, cheap. My first thought when I unboxed the Mora Companion was, "I'll have to get a new sheath." And when I gave the Mora Classic Craftsman 612 as a gift to my stepdaughter I felt the need to apologize about the cheap sheath.

Last week I was browsing around the Pathfinder Store at Dave Canterbury's Self Reliance Outfitters (looking at knives of course) and I came across a leather sheath specifically made for Mora Knives which I promptly purchased for $12 (now going for $16)... And finally I've arrived at the whole purpose of this post. I know based off of user reviews and what I've read on discussion boards that as much as people love the Mora knives they hate the Mora sheaths, and so I wanted to make my readers aware that here is an option to significantly upgrade your sheath at what I would consider a very reasonable price. I've only had the sheath for about a week, so this is not a product review by any means, but it certainly appears robust, well made, and just really nice looking, and it holds my Mora Companion safely and securely. According to the website the sheath fits most Mora knives, so if you have one and hate the sheath, definitely give these a look (link below).

http://www.selfrelianceoutfitters.com/brown-leather-pathfinder-mora-sheath/

Mora Companion with leather Pathfinder sheath
Mora Companion with Mora plastic sheath


Monday, October 14, 2013

Gear Review: StrongVolt Solar 7 - Portable Solar Charger

SrongVolt Solar 7

The StrongVolt Solar 7 is a lightweight 7 watt solar charger that will keep your devices running while you're on the go. From hiking to emergency preparedness, the Solar 7 is an essential piece of kit for the connected consumer of the electronic age, and will come in handy in a host of situations.

 The Solar 7 retails for $59.99, and consists of 4 laminated solar panels and one USB output at the end of a 6.75 inch cord.  At 11.45 ounces, the Solar 7's weight won't be noticed by anyone but the worst gram weenies, and even they would find the extra ounces worth it. Completely unfolded, my charger measured 7.5 x 20 inches. Two grommets (which appear to be stainless steel) at one end of the charger allow for easy hanging from backpacks or trees (or wherever). Folded up, my charger measures 7.5 x 4.25 inches, and doesn't seem much bigger area-wise than a woman's checkbook style wallet. A Velcro strip keeps the charger closed.

The StrongVolt Solar 7 is so portable that I carry it even when I'm not sure I'll use it. In other words I carry it "just in case". Folded up, it fits easily into my backpack's lid pocket for quick access. I've brought it with me hiking and fishing. I've carried it around town, to baseball games and parades, and other community events and festivals. 

Carrying portable power gives me piece of mind that I've never had before. Just last Saturday at my stepdaughters softball game, I brought the StrongVolt Solar 7 and charged my phone while I watched the game because I forgot to plug it in the night before, and the battery was nearly dead. By the time the game was over, my phone was fully charged. It is so easy to do too. Just unfold the charger, make sure the panels are facing toward the sun, and plug in your phone. Done.

StrongVolt Solar 7 lashed to my daypack.
The Solar 7 is easy to carry both folded, and unfolded while in use. Although easy to hang, having only two grommets limits the configuration possibilities. The best and really only way to attach the Solar 7 to your pack is by hooking it to the top of the lid, and letting it hang down the back of the pack, using cordage of some type to secure the bottom so it doesn't flop about. Although this configuration is secure, it does't allow the charger to face upward at the optimum angle needed to catch the maximum amount of sunlight possible while on the move. Instead, the solar panels (except perhaps the very top one) generally face the horizon while travelling on a flat surface. 

In Phoenix (aka The Valley of the Sun), carrying the charger this way didn't produce any noticeable decrease in performance of the charging capability. My phone always stayed charged, even while running GPS apps to track my location that would normally drain the battery faster. In all of my tests, the charging power was stronger than any drain created by continually running apps, so that when I returned to the trailhead the charge on my phone's battery was either equal to or higher than it was when I started. This ability to keep your phone charged on the go is what makes the StrongVolt Solar 7 so great for hikers, backpackers, hunters, mountain bikers, or anyone using GPS apps for route tracking and/or navigation. 

On the go with the StrongVolt Solar 7
That is exactly what the StrongVolt Solar 7 is great at, keeping your devices charged. No need to wait for the battery to drain completely. Keep it plugged in, keep it charging, just like you would at home. I did however charge my devices in the backyard from a dead battery just to see how long it would take. For my Nokia Lumia 920, it generally took 3.5 to 4 hours to reach full charge. My Microsoft ZUNE HD media player took 2 hours. Although the Solar 7 certainly can be used to charge a dead device, It's just more efficient to keep your device plugged in, especially if you are hiking, or camping, or even boating. There is absolutely no reason why your device can't stay plugged in... Unless you are charging someone else's device of course.

The only problem with the StrongVolt Solar 7 is that it does not store power. Something I notice every time I find myself resting in shade. Living in the desert, it doesn't pose too much of a problem for the majority of my hiking, since there isn't much shade, and it's rarely ever cloudy. That being said, if you do most of your hiking in shaded areas (in other words, you hike among tall trees or areas where overcast skies are common) you might want to skip this charger because it would not work. Literally the second the Solar 7 enters the shade, your device will cease to charge. StrongVolt does sell a small battery pack for $44.99 that stores power from the charger (which I have not tested). If the battery pack (which StrongVolt calls a "Power Bank") works as well as the charger it would be worth the investment, because you could literally save power, and charge you devices on sunless days. 

The StrongVolt Solar 7 also seems durable and very well made. The housing is a very tough canvas-like material, and after a month of use It's still in great shape. I certainly put it through its paces, and there isn't any loose threads or stitching, or any sign of wear other than on the laminate that covers the panels. During some off-trail travel through thick vegetation, the laminate suffered some damage in the form of small punctures, and scratches. Living in the desert, its not really surprising considering much of the plant life has thorns, barbs, spines, and other sharp defensive implements. If you are considering buying this product, I would just suggest stowing it before any major bushwhacking.

Overall, the StrongVolt Solar 7 Portable Solar Charger is an awesome piece of gear with unlimited potential. As long as you have sun, you can use it in any outside situation to charge your device, whether in the woods or in town, climbing the mountain or grilling out at the park. It is lightweight, compact, and easily carried. I love this charger. It has become an essential piece of my kit, and I would love to get my hands on that Power Bank.


Disclosure: I am not affiliated with StrongVolt in any way. I received this item at no cost for reviewing purposes. My review is my own honest assessment of the product.


Thursday, March 28, 2013

Gear Review: Solo Stove

Solo Stove
Cooking with the Solo Stove

I find the idea of a wood burning stove very appealing. Maybe because it feels like it brings me closer to the wilderness travelers of yesteryear, cooking as they did... I think fire in general can conjure up those primal feelings in people, and in a way, that's also why we hike. To connect not only with nature, but our past as well. 

You can bet this nostalgic affection for fire played a part in my impulse purchase of the Solo Stove a couple months back. The notion of cooking over an open flame compelled it. I pictured myself, not just a backpacker, but a mountain man... I know, that's really stretching it, but I'm feeling very romantic as I write this.

The stainless steel Solo Stove (according to Solo Stove) is a "natural convection inverted downgas gasifier stove". The double wall design "channels" air through the intakes at the bottom to the fire box, and sends warm air up between the walls, and out smaller holes on the top, and back into the fire box. I know, it all sounds very technical for a wood stove, but what it all means is that it burns and heats very efficiently. 

The Solo Stove is two pieces, the stove, and a removable cooking ring. The ring flips upside-down and fits inside the stove for easy storage. The whole thing is very solid, and seems to be built really well, all thanks to what Solo Stove calls "one piece construction". Which basically means that the stove is built from a very few solid pieces of stainless steel, with the smallest amount of welds and seams as possible. It makes for a very durable piece of equipment.

For a stove, I guess you could say that its big when compared to a canister or alcohol stove, but keep in mind, with the Solo Stove you don't need to carry fuel. That was a big selling point for me. The idea that I not only don't need to carry fuel, but I don't have to worry about running out of fuel either. The Solo Stove will burn just about anything too, especially after its lit. A lot of my hiking is done in the Sonoran Desert here in Arizona, and I found that cactus wood burned just as well as wood from a tree. The firebox in the Solo Stove gets so hot, that just about anything that fits inside will burn.

The Solo Stove is supposedly designed to fit in most cook pots for easy storage. Since I only own one pot, my Solo Stove rode in my GSI Pinnacle Soloist pot, and it was a perfect fit. Although I would recommend against using this pot, as the large flames from the Solo Stove has the potential to melt the plastic lid and rubber coated handle of the Pinnacle Soloist pot. What I did was just adjust the position of the pot on the stove if I saw a flame getting too close. I didn't have any melting, but the orange rubber coating on the handle did turn black in places.

Firing up the Solo Stove is really easy. First, collect some wood and/or other organic materials from around your camp. You need a lot less than you think. To start it, I found the best way is to take off the cooking ring, place a layer of small sticks on the grate, and place your tinder on the sticks. Once the tinder is lit, put the cooking ring back on, and start feeding it smaller sticks. If you have fire building experience, this process will be quick and easy. Once you have a good flame, place your pot on the cooking ring. From here on out, its just a matter of feeding the stove to reach a boil, but you have to pay attention. The Solo Stove is not a stove you can light and walk away from. It needs to be fed. The firebox gets so hot, that neglecting the stove even for a couple of minutes can result in the fire going out because the wood inside has burned up. At the opposite end, overfeeding the stove can smother it, but once you have it figured out, keeping the fire burning is easy. My first use with the Solo Stove, I reached a boil in 5 minutes. I have cooked for 2 with no problem, and have sustained a boil easily for 15 minutes... All using fuel that I found on the forest floor. 

That is really the best thing about this stove. Its easy. Its simple. Its minimalist.  No mechanical, or electrical parts. No gas lines or fuel cans. In short, nothing that could fail, because as Murphy's Law states, "what can go wrong, will go wrong", and when you're in camp after a long day on the trail, you want your stove to work.

Not that everything is perfect with the Solo Stove. For starters, its relatively heavy at 9 ounces. For me, the weight is fine, but for the ultralight crowd, its probably too heavy. Clean-up can be a pain too. You'll have soot build up at the bottom of your pot that will need to be cleaned before you pack up (unless you want soot in your pack). I would recommend carrying a small camp towel for this purpose. Since its an open flame, you wont be able to use it in some places (like Glacier National Park for example) that don't allows fires in the backcountry. There may be some places in the backcountry where you just cant find any fuel. I don't know where those places are, but I'm sure they exist. Finally, in a very wet environment  you will probably have difficulty with this stove just like you would building a fire. To what extent I don't know, since all my tests were in dry conditions (I live the desert remember?).

Overall this as badass little stove. Its easy, simple, efficient, and fun to use, and will work excellent for your backcountry cooking needs.


Solo Stove
Solo Stove set-up. You need a pile of small sticks... And notice no smoke coming from the stove.

Tuesday, January 22, 2013

The 10 Essentials

Desert Backpacking
I remember a steep climb under a relentless sun. It was miserably hot. Shade was nearly non-existent. My feet hurt from the rocks and stones that littered the trail, and my clothes were drenched in sweat from the climb and the heat. I rounded a bend, and saw a large man sitting in the middle of the trail. He was sweaty and dirty and wore a look of distress on his swollen face. One of his feet was bare, the other wore a flimsy looking black flip-flop.

"You look prepared" he said matter-of-factly as I walked up, no doubt noticing my bulging backpack and guessing (correctly) that it was full of gear.

 "You have to be out here" I replied while I pondered his predicament. No pack, 1 bottle of water, and flip-flops for shoes. I recalled all the warning signs at the trailhead imploring hikers to be prepared, and wondered why this man had ignored them.

 "You wouldn't happen to have any duct tape so I can fix this flip-flop do you?" he asked, obviously embarrassed.

"Actually, I do" I replied, as I took my pack off and fished out my FAST kit. I had a little roll, maybe 4 or 5 feet worth, but it was enough to fix his destroyed flip-flop. I gave him the roll. I didn't mind giving it to him. I have been carrying duct tape in my pack for 3 or 4 years, and have never had to use it for repair... But I carry it because one day it might save my ass.

It pays to be prepared in the wilderness. Even on a day hike, you should at least bring the essentials, because you never know what's going to happen. A broken flip-flop may be a poor example, because you shouldn't be hiking in flip-flops anyway, but if I hadn't come along with duct tape that guy could have found himself in a survival situation. Just last week a man and his two sons died from exposure on a day-hike after the weather turned foul. In one afternoon the sky went from blue to heavy rain, and temps dropped from the 60's to below freezing. They couldn't see in the downpour and sudden cloud cover, and lost their way. They weren't packing the essentials. Tragically they froze to death overnight. 

What are these essentials you may be asking? The 10 Essentials are a list of essential systems you should always take hiking, that will increase your chances for survival if something goes wrong. Chances are many of the items comprising your 10 Essentials will never get used.

10 Essentials

1) Navigation - Map and compass, and the ability to use them properly. Even day hiking in areas near town that I know relatively well, I always bring a compass. In the backcountry, a topographic map is a must. I'm not saying you have to be an expert at orienteering to go backpacking (as I most certainly am not), but you should at least know some basics. And remember, while a GPS is a great tool, it should never be relied on for your sole means of navigation, because electronics fail, and batteries run out, and in the case of a GPS, you wont always have a signal. If your'e interested in learning orienteering (map and compass) check out your local orienteering or hiking club. Outdoor outfitters often teach classes too.

2) Sun Protection - Sun glasses, hat, sun screen. I always bring these items, but rarely use sunscreen. I never hit the trail without a hat on.

3) Insulation - An extra layer of warm clothing (fleece or a down jacket), beanie and gloves. Temps can change rapidly and unexpectedly in the wilderness, especially at higher elevations. Even in the summer when its hot, you should bring a jacket in your pack. Chances are you wont ever use it, but it could save your life if you had to stay overnight in the wilderness. Even on day hikes I always at least carry a fleece in my pack. When I go backpacking, no matter what the season, I carry a fleece (or a down vest), a beanie, thermal underwear, and a pair of gloves.

4) Illumination - Headlamp, flashlight, etc. I always carry my headlamp, even on day hikes. If for any reason you find yourself on the trail past sundown, you at least have the means to see in the dark. Your headlamp or flashlight can also be used for emergency signalling.

5) First-aid kit - My first-aid kit goes with me hiking, backpacking, and camping, and on almost every trip I dip into it at least once. You can buy pre-packaged kits from you local outdoor outfitter, but if you want to make your own, The Washington Trails Association has a pretty comprehensive list of items. One random item I always bring that often gets overlooked is tweezers. I've used them to pull out ticks, and just last weekend saw someone on the trail using them to pull cactus spines out of their arm. Over the years I've given out band-aids, moleskin, antibiotic ointment, ibuprofen, and burn cream (to name a few) to people on the trail who either didn't bring a first-aid kit, or who didn't bring an adequately supplied kit.

6) Fire - More specifically, the means to start a fire: Lighter, waterproof matches, fire steel, etc. If you've ever watched Dual Survival, or any of the survival shows on TV,  you'll know that fire starting is one of the top priorities in a survival situation. I keep a small box of waterproof matches in my FAST kit, witch always goes with me. Of course, unless you plan on smoking a joint on the top of the mountain, you probably wont use your lighter on a day hike. But remember, the 10 Essentials are designed to help you deal effectively with an emergency situation. If you find yourself stranded overnight, a fire will not only keep you warm, but can also be used for signaling, and it's a big morale booster too.

7) Repair Kit - Duct tape, safety pins, needle & thread, and cordage, to name a few. Again, the chances of you having to use these items are small, but if the need should arise, you'll be glad you have them. I carry all those items I listed. Duct tape is an important one because it fixes almost anything. Just think about what gear you are taking, and how they could fail, and plan accordingly.

8) Extra Food - Often times on day hikes, I see people carrying a bottle of water in their hand and nothing else. I always at least bring a couple granola bars or trail mix or beef jerky. Obviously, a human being can go a long time without eating, but that doesn't mean you'd want to. Eating food can be a morale booster, plus it will help keep you warm at night if you eat before bed.

9) Hydration - Nothing is worse than running out of water miles from your next source. I know because I've done it. Always bring extra water on your day hikes. If climbing the mountain is steeper than you anticipated, or the temps are higher than reported, you'll be glad you did. If you are going backpacking, then you need a way to treat the water you find in the wilderness. A filter is the most popular method. You can also treat it chemically, or with UV light. There's lots of options, so do your research.

10) Shelter - Tent, bivy sack, emergency blanket. When you're backpacking this is a given most of the time, although here in Arizona a lot of people cowboy camp, but even they should have some form of shelter just in case. I keep an emergency blanket in my FAST kit that always goes with me, even on day hikes. It might seem ridiculous to carry shelter on a day hike, but if you are caught in a storm like that poor man and his sons were, shelter from the rain could be the difference between life and death. Hypothermia kills. 

If I could add anything to this list it would be this: Rain Gear. For me that means always bringing a rain jacket, even on day hikes, even in the desert. For backpacking, I bring a rain jacket and pack cover, always, no matter what. Frankly, I don't want to be wet and I don't want my gear wet. Not only is it uncomfortable, but it's dangerous. Keeping yourself and your kit dry should be a top priority in the wilderness.

Disclosure: I am by no means a survival expert. I had been thinking about writing this for some time because I frequently see people on the trail carrying practically nothing, and when I heard about that guy and his two sons dying on a day hike, it finally compelled me to sit down and write. This information is nothing new. I didn't invent the 10 Essentials. I am just passing it along in case someone doesn't know.

References:

http://news.yahoo.com/illinois-father-two-sons-freeze-death-during-hike-193245919.html

http://www.rei.com/learn/expert-advice/ten-essentials.html?gclid=CJ_m8fqL-7QCFUjZQgodSDMAIg&s_kwcid=TC|13029|10%20essentials||S|e|19595601845&ef_id=ULmYdwAAUUeBV3Nh:20130122040944:s


Wednesday, June 23, 2010

Snowbound


The next time I go to Mount St. Helens, I have to climb to the top. After all, every person I told about my trip last week responded with the same question, “Are you climbing to the top?” It seems, even, that some people can’t think of any reason to go to Mt Saint Helens other than to climb to the top; which is exactly why I planned a trip to the remote northern edge of Mount St. Helens National Monument, because I knew no one would be there.

The plan for this trip, revised a dozen times, and finalized the night before we left, went like this. There were 2 groups of three backpackers. Group A, consisting of my brother Kelly, Jason, and myself, would enter at the extreme north side of the park and backpack roughly 11 miles through cascading waterfalls and rushing mountain streams, over the 5,200 foot peak of Tumwater Mountain, to a sandy-beached mountain lake called “Deadman”, where we would meet with Group B, Luke and the two Steve’s. They were coming in from the northeastern end of the park at a place called “Ryan Lake”. They would backpack up the Goat Mountain Trail, summit the mountain, and meet us at Deadmans Lake 5.5 miles in.


We made the 6 hour drive late in the afternoon on Thursday. After dodging a few elk along White Pass we arrived at our trailhead at about 1 am. Well, technically it wasn’t our trailhead. The week before, due to the higher than normal volume of rain, there was a rockslide that completely buried a section of the road in dirt and huge granite boulders. We knew about the rockslide in advance so we parked the car and hiked in the dark about a half mile to the actual trailhead and pitched our tents. We awoke in the morning blanketed in fog and as we broke camp and sipped coffee we talked about how great our day was going to be. Before we started out we were surprised to realize when the fog lifted that we had camped about 20 feet from a giant cliff that dropped perhaps 100 feet or so into a beautiful tree filled valley below. I suppose that’s why they say you shouldn’t hike in the dark.


The trail skirted the mountain side going up and down over numerous mountain streams running hard from the Spring thaw. Water was everywhere. It poured from the mountain and even seemed to leak from solid rock. Green was everywhere! The forest floor was covered in small green plants and ferns, and moss and lichen hung from rocks and trees. To me it seemed ancient and pre-historic, and reminded me of the rainforest on the Olympic Coast and of the inland rainforest of the Salmo-Priest wilderness.

We passed a cave and several small waterfalls. We saw spider webs rigged like nets on the hillside to catch falling insects, and everywhere we looked we saw slugs. What took the cake however, was the massive 150’ Leona falls. This enormous waterfall drops majestically from above onto a huge moss covered rock below creating an unforgettable scene, and just like the movie “Last of the Mohicans” our trail went around behind the falls into a huge limestone cavern. It was an amazing experience.


The trail now began to descend into a valley where we came across an ancient goliath standing near the trail. I’m no botanist and I don’t know the species, but I can tell you it definitely was not a cedar. The tree was one of the biggest I’ve ever seen. When I put my hand on it I felt like that tree had stood watch over those woods for hundreds of years… And it probably did.

Water was everywhere, and the sound of its flow filled our ears, from the gentle melody of a meandering stream to the violent cacophony of water breaking over rock. I remember standing on the trail looking down into a lush green canyon at a surging stream cascading over rocks and under deadfalls and I was overcome with the realization that I was witnessing beauty in its purest and realist form, and I felt blessed to be there and be a part of it…


After fording a couple streams we began to do some serious climbing. Straight up the trail went as we switched-backed our way to the top of Tumwater Mountain. The green gave way to gray and brown as the temperature got colder and the air became thinner as we climbed higher and higher. The pitch was steep and we just had to put our heads down and drive-on. We knew we were getting close to the top. At about 4,500’ we took a breather and in high spirits talked about how good of time we were making… It was 1 o’clock.

A hundred feet later we ran into fog, and not long after that we noticed snow on the forest floor. We were nearing Tumwater Lake, which is really just a pond that sits in the shadow of the peak near the summit. As we rounded a bend our trail disappeared into snow, and in front of us, as far as we could see, was snow. At this point I really wanted to stay on track. I wanted Jason and Kelly’s first time backpacking to be nothing short of totally amazing. So, we continued on, using map and compass, and Jason’s GPS, to keep track of our location. We came to a snow-covered clearing and I immediately realized that I was looking at Tumwater Lake, still frozen, and covered with snow. I was counting on this to be our water source. We hadn’t seen water in a couple miles and aside from a couple swallows in Jason’s bottle, we were dry.

At this point I considered turning back, but stubbornly I suggested that we should go on, and that we could pick the trail back up on the other side of the mountain. It was slow going in the snow. Although some of it was packed hard enough to walk on, some of it wasn’t, and as a result Kelly and I kept falling through the snow, sometimes up to our waist. We were skirting a hillside and the going was slow and grueling. I kept thinking that over the next ridge, the snow would be gone, so we kept inching forward. We all started to become fatigued. My mouth was parched. My lips were dry and cracking. I desperately wanted a drink of water, and although we were surrounded by snow, I did not want to stop our progress to boil any. I was exerting myself much more now than the hike up. I started feeling sick and clumsy, but stupidly I kept moving forward. I knew that If I was feeling this bad, Kelly and Jason might be too since they have never even been backpacking before and I was in better hiking shape. Jason announced it was 3 pm. We had spent nearly 3 hours trudging through snow.


I had a topographic map in my hand, and I stumbled in the snow and sunk to my groin. 5 minutes later I realized that my map was gone. Finally we stopped and huddled up. I knew we had to turn back. I kept thinking of the Donner Party snowbound in the Sierra Nevada’s eating each other to survive. I was just telling Kelly the day before that in survival situations the skinny person always dies first. I told Jason that he might be on the menu if we stay out here any longer, but I was still torn with this desire not to let Kelly and Jason down. I told them to wait while I climbed to the top of the next ridge and looked on the other side. I got about a quarter of the way and thought “what the hell am I doing?”

We turned around and followed our old footprints to the frozen lake, where we took our packs off, had a snack, and rested. I used a stick to poke a hole through the slushy ice on the lake and we all filled our water containers. After a brief respite we made our way back to the trail and a flat spot on the mountainside where we made camp on the only dry spot in a field of snow. We were all wet from being in the snow so long. Kelly and Jason both had leakage into their boots that soaked their socks and turned their toes blue. We ate dinner, but despite our best efforts, could not get a fire going. No sooner did we retire into our tents for bed did it start raining. I laid there in my sleeping bag going over the last part of the day in my mind. I should have never led us into that snow. A lesson I will never forget.

It rained all night, and it was pouring buckets while broke camp the next morning. Everything was soaked; our packs, our clothes, our tents, everything. We decided to skip breakfast and power-hike down the mountain, and power-hike we did. We came down in less than half the time it took us to go up, and by 11am we were sitting in the Mount Adams Café drinking coffee and hot cocoa.

It turns out Group B with Luke and the 2 Steve’s had a similar experience. They ran into snow and lost the trail at around 5,000 feet on Goat Ridge, and camped on the ridge next to a snow field. All in all it was a great trip. It didn’t end the way I would have liked, but I had fun and learned a lot, and everyone got home ok.