Backpacking during the holidays is great because everyone is at home. My Uncle Steve and I used to backpack every 4th of July. We relished the solitude and chance to have the wilderness to ourselves. So it was in the Superstitions last week. Although the Peralta Trailhead was jampacked with vehicles, we encountered only one other group of backpackers in an area that is usually extremely popular.
Rocco lapping up water
The trick with the desert, and indeed the Superstitions, is the lack of water. Due to the recent rains however there was plenty along the trail. It was great for Rocco who had lots to drink and plenty of chances to cool off. Water also gives the backpacker peace of mind. Up in the Pacific Northwest I always took water for granted. Down here in the desert it's a luxury. To have available water is a big confidence booster when backpacking in the desert.
The Superstitions
Our original plan was to connect several trails to make a clockwise loop from Peralta Trailhead and overnight at LaBarge Spring. We arrived at the trailhead much later than expected however and had to change the plan. After a relatively easy jaunt through thick desert scrub we arrived at Terrapin Pass near the base of the famous Weaver Needle. The pass offered amazing views of the desert mountains so we decided to make camp. The only drawback was that there was very limited space for pitching tents and no cover from the wind. So, I pitched the tent (for the girls) and my tarp nearly right on top of each other on the only relatively flat spot in the area.
Terrapin Pass camp. Weaver Needle in the background.
Lying under my tarp with Rocco that night I felt him shivering like crazy. I felt bad for him so I unzipped my sleeping bag and let him crawl in as much as he could. It didn't work. He was still shivering. I couldn't figure out why he was so cold because his body felt warm and was radiating tons of heat. Eventually he crawled into the tent with Sarah and Bianca. I'm sure it was cramped quarters in the tiny 2-man tent, but it was the only thing we could do to keep the dog warm. At about 3am the wind picked up intensity. I had to get out and tighten the guylines to prevent the tarp from flapping so much, The wind was blowing really hard up on that pass. I'm guessing 40 mph or more. When I awoke around 6am, I saw that my tarp had partially collapsed. I also saw that the wind was hitting the tent at a direct broadside, which bowed it nearly in half. Normally when I anticipate heavy wind like that I would pitch the tent with the most aerodynamic end facing into the wind. but the area we were camping prevented me from doing that this time.
Sarah, Bianca and Rocco on Terrapin Pass.
Despite a freezing dog, a partially collapsed tarp, and a beat-up tent, we still had a great time. The temps were perfect and the scenery was amazing. If you've been wanting to get into the Superstitions, this is a perfect time. The recent rains have filled the springs and sprinkled the lowlands with pools of water. If I can find the time, I will return as soon as I can.
I read somewhere that Red Fox was The North Face of Russia. It's so popular that even Vladimir Putin wears it. I don't know if that is true, and frankly it doesn't really matter. Brand popularity doesn't interest me, good gear interests me, and the Red Fox Odyssey 80 backpack is definitely good gear.
The first thing I did when it arrived was fit the pack. With a fully adjustable torso I had it dialed in pretty quick. I loaded it with 30 pounds and paced around the house. It felt too good to be true. I had to see more. An hour later I was on top of a mountain. The pack had preformed beyond my expectations and had comfortably hauled my haphazardly packed load with ease.
A few days later I was standing on the south rim of the Grand Canyon. The Odyssey 80 was brimming with backpacking gear, 5 days of food, and nearly 2 gallons of water. Even with a successful test-run, I wasn't looking forward to carrying that weight over the next 34 miles.
If there ever were an ultimate proving ground for gear, it’s the Grand Canyon. The place is extreme, and in all my adventures over the years I've never encountered anything like it. The rocky terrain, unrelenting sun and insurmountable giant-cliffs everywhere will test the mettle of any backpacker, especially if you veer far from the popular corridor trails like we did. Needless to say, the Odyssey 80 took a beating: It broke my fall after I slipped on loose rocks, and was repeatedly dropped and manhandled. It was forcibly squeezed through narrow openings in-and-between rocks, and was lowered by rope down a twenty-foot cliff… All that, all the time. The rocks tore holes in other packs from my group, but the Odyssey 80 still looks brand new. That’s what I love about it. It’s a beast!
Lowering the Odyssey 80 down a cliff.
This beast isn't just durable, it’s huge… and hungry. With a massive 80 liter volume the Odyssey will swallow just about anything you stick down its gaping maw, and with multiple pockets and compartments, organization is easy. A variety of lashing points on the outside gave me options for securing my trekking poles when I needed my hands, and the zippered side pockets were long enough to fully secure Smartwater bottles with an attached Sawyer Mini. The storage options are many, but with all that stuff comes weight. The Odyssey’s aluminum frame carried the near 40 pound-load admirably, while the heavily-padded hip-belt was a welcome change from the ultralight backpack I normally use.
All these amenities make for a very technical trekking load-hauler, but all the floppy straps dangling from my pack was annoying. Regrettably, the backpack doesn't have any lashing options on the lid where I really needed them for fixing my solar panels to keep the GoPro charged.
Adjustable torso is easy, but slips.
The only real problem I had with the Odyssey was that the adjustable torso, which is essentially a strap, slowly slipped throughout the day. Whereas I would set my torso length at “medium” in the morning, by late afternoon it had slipped a quarter of the way to “small”. It wasn't a huge slip, but it was certainly enough to feel it in my shoulders. Eventually I got in the habit of checking the torso length every time I took the pack off.
Despite a couple hiccups the Odyssey 80 is a nice backpack capable of hauling heavy loads over rough terrain. It’s large enough to accommodate any gear requirements with a variety of storage options, and will stand-up to even the worst abuse. Anyone looking to take their adventuring to the extreme should definitely give it a look.
Packs on the trip from Osprey, Deuter, REI, and Red Fox.
For the entire catalog, check out the Russian language page. I believe most of this gear will eventually be available through Red Fox North America.
Disclosure: I was given the Red Fox Odyssey 80 by Red Fox at no cost of my own for the purpose of a product review. The opinions expressed in the review about the product are my own.
Update: 2/11/15
Recently I lent this pack to a friend to use. He pointed out that he could not adjust the torso length past medium, and that one of the aluminum stays was tearing from the backpack. At first I thought he must be mistaken, but after he returned the pack I inspected and confirmed his observations. As you can see from this photo, one stay has ripped through the fabric, and the other appears well on its way. I don't know whether this is a design flaw or simply a defect. I did not spot this problem earlier because I never attempted to adjust the pack past medium, and the stays cannot be reached without removing the back panel. Although it is entirely possible that the slipping torso length that I experienced in the Grand Canyon was a result of this. Consequently. I cannot recommend this backpack due to the failure of the suspension and torso adjustment systems so soon.
Have an outdoor lover in your life? Not sure what to get them for Christmas? Check out this list of really cool yet affordable gear that is sure to satisfy adventurers of any level. These prices reflect the current regular price at REI.
This 80 lumen headlamp is one of the lightest and smallest on the market, and It only takes 2 AAA batteries (instead of the industry standard 3). But the coolest thing about it is the "power slide" function which allows you to control the settings without any buttons. Great for running because of the size and weight. It's still fairly new to the market so not a lot of people have them.
The Buck 110 Classic is a beautiful knife with a design that has stood the test of time. This is the knife your grandpa used to own and is sure to score big time for nostalgia and aesthetics. Made in the USA with 420HC stainless steel, it also comes with a black leather case that will attach to the belt.
Some hikers just hate to carry a backpack. If you know someone like that then buy them a ChicoBag. It hangs over your shoulder like a satchel, and will fit most water bottles. In Phoenix they're a real hit with seniors, who come in REI frequently asking for them.
More of a specialty item but one that anyone will appreciate. The Sawyer Mini water filter will enable anyone to safely drink from water sources found in the woods. It is light, small, easy to use and guaranteed to 100,000 gallons. It's great for hunters and backpackers, and would make a good gift for any prepper in the family too.
The undisputed king of water bottles, a Hydro Flask will keep liquid hot for 12 hours and cold for 24. Great for morning coffee, hiking, camping, hunting, and just about any other activity you can think of. Owners are like a cult, and will swear by the Hydro Flask over any other piece of kit. Come in a variety of colors and sizes.
Don't let the looks fool you, this is actually a sweet little gadget. Almost everyone carries electronics into the woods these days. With the Brunton Torpedo, you can keep your devices charged and not worry about battery life so much. The best part is you can charge it in your car on the way to the trailhead. This would be a good gift for anyone who uses a GPS or an MP3 player on the trail.
A best seller and winner of Backpacker Magazine gear awards, the Flash 18 offers mobility and versatility. Great for travel, it packs down very small and can easily fit into any carry-on luggage. Could also be great for bike commuting.
You've never truly lived until you have worn merino wool socks. These from Darn Tough are made in Vermont, and are widely considered the best socks money can buy. Any outdoor lover would appreciate them, and they last forever.
Runners come into REI all the time looking for hydration belts because so many of them hate carrying backpacks. This one from Nathan securely holds 2 10 oz. bottles and has a nice sized pocket for your giant cell phone, wallet and keys. Also nice for hikers who go light.
Maybe my favorite item on the list, this cooler is great for easily carrying cold drinks. You can use it for fishing, picnicking, concert going, or hiking into your favorite swimming hole. It will hold about a 6-pack, and features a variety of pockets for stashing other gear. Also works great on road-trips.
Disclosure: I work at REI, but I created this blog post separately and independently of REI. These reflect the top 10 items that, based off my own opinion and experience, would make great gifts.
Hiking in 100 degree heat with the sun pounding on you is hard, and everything you do in that heat is harder than normal. You have to be prepared for those extreme conditions, because extreme conditions can produce extreme consequences. Here are my top 10 tips to ensure your desert hiking will be as safe and fun as possible.
1) Acclimatize - The more you hike in the desert, the better you handle the heat. My first couple desert hikes left me feeling sick and demoralized. If you plan on backpacking in the desert or doing any serious day-hiking (like hiking to the Colorado River and back in one day in the Grand Canyon) I would recommend plenty of desert day-hiking beforehand. Start small.
2) Temper Your Ambitions - Like I mentioned above, everything is harder in the heat. Expect routine distances and climbs to push your limits. What you can easily accomplish physically in milder climates will be a challenge in the desert. You'll need to be in better shape than what you're used to.
3)Carry a Backpack - One of the strangest sights I see in the desert are people without backpacks... And I see it all the time. If you're not carrying a backpack then you are not carrying the essential supplies needed to safely traverse the desert. The problem is that nobody thinks anything bad will happen to them, but bad happens all the time. You gamble with your life every time you go out without gear. Around the United States, unprepared hikers are constantly being rescued from avoidable survival scenarios that are usually preventable by bringing some common-sense items. You need a backpack to carry those items! You need a backpack to carry water, which is muy importante in the desert. Check out The Mountaineers list of 10 Essentials for what else to carry in your backpack.
4) Bring More Water - Unless you've hiked in the desert in summer, it may be hard to imagine just how much you can sweat, and how thirsty you constantly feel. I've found that bringing double the water I normally bring is just enough. Last Saturday I finished 4 liters on a 7 mile hike. Trust me, you'll need to drink much more water than normal. In the Grand Canyon we started off 3 out of 5 days with 2 gallons of water each, and we drank it all by the end of those 10 mile days. Also, keep in mind that water is really going to dictate where and how far you hike. If you bring 4 liters and notice that you've finished 2 already, then its time to turn around and head back to the car. The bottom line is that venturing out into the desert with an inadequate water supply can easily lead to an evac by search & rescue, and even death. Be prepared.
5) Wear Proper Footwear - Hiking in the desert isn't a walk in the park. The ground can be jagged rocks for miles on-end. Or it can be loose rock and sand that can slip tread and sprain ankles. Furthermore, any variety of cacti will poke the hell out of you at every opportunity. Wearing sandals in the desert is inviting pain and courting death. Wear shoes that will protect your feet from the flora and won't disintegrate from the sharp rocks. If you wear running shoes, consider gaiters to prevent debris from getting into the shoe. Finally, if you're going on a long trip, make sure your shoes are up to the task. The last thing you want is for your shoe to fall apart in the middle of the desert, I've seen it happen.
6) Seek Shade- Heat stroke is a serious risk, and keeping your body from overheating is going to take effort on your part. If you come across shade, take your pack off and sit in it for a few minutes. Drink some water. Let your heart slow down. Let your body cool a little bit. I usually plan my breaks around shade instead of distances. I'll say to myself, "The next shade I come to, I'll take a short break". Trust me, it really helps taking a break in shade versus taking a break in the sun, which can be totally miserable and can sap your energy even further.
7) Sun Protection - This one seems like a no-brainer. Keep sunscreen in your pack. Wear a hat to keep the sun off your face. Wear a wide-brimmed hat or drape a bandanna from the back of your hat to protect your neck. A buff works great at protecting the back of the neck and your ears. Another good idea is sun protective clothing. The Columbia Silver Ridge or REI Sahara line of hiking clothing offer sun protecting, moisture wicking clothing that are great for the desert. Wear polarized sunglasses. I have forgotten sun screen multiple times, and got burned for my stupidity. Now I keep a tube in my day-pack at all times.
8) Keep Track of the Forecast -. I like to use 100 degrees as a good mark of when to start and when to stop. If it's 100 in the morning when I plan to start then I stay home, because it will only get hotter. If it's 100 in late afternoon when I plan to start, then I'll go, because it will only get cooler. Hiking in 110-120 degree weather is too dangerous, and I wouldn't recommend it to anyone, but 100 is doable as long as it's the peak temperature. You can beat the hottest times of the day by hiking near dusk and dawn. Just remember, your tolerance for the heat will be different than mine, so knowing what temperatures you are comfortable with will be key for planning trips.
9) Electrolyte Replacement - I learned this lesson the hard way. For most climates, eating salty snacks like trail-mix and GORP is enough to replenish electrolytes lost during the physical activity of hiking. Since the amount you sweat significantly increases in the desert, supplementing your snacks with an electrolyte replacement can be vital, especially on rigorous days. Besides a whole mess of symptoms ranging from vomiting and dizziness to diarrhea and muscle cramping, electrolyte imbalance can lead to death. Check out brands like Nuun and Hammer that make tablets that easily dissolve in water. 10) Respect and Common Sense - Nothing is a substitute for common sense. Remember that playing in extreme environments can produce extreme consequences. Trust your gut and respect the land. You can't beat the desert, but you can travel through it by foot safely and comfortably if you use your brain. If you're out of water and come across a puddle: better fill up. If you are confused about the best way forward: turn around. If you start feeling weak or dizzy: take a break in some shade and drink water. If you see a sign at the trailhead warning you not to do something: don't do it. You aren't Cody Lundine and this isn't a movie. If you don't respect the desert it will punish you unmercifully.
*This post was adapted from a post I did last year called Desert Walker.
I awoke on day 3 feeling refreshed. The tranquil sound of slow running water lulled me into a deep sleep that was a welcome change from the blasting sand from the night before. After a quick breakfast we backtracked up the drainage. The day before on the way down I wondered how we would get out of there. Sliding down rock was one thing, but climbing back up seemed an entirely different animal. My worry was for nothing though, because the climb out was easier than expected. By day 3 all of us were so used to scrambling that it had become just like walking. You just did it without thinking. The path of least resistance came naturally.
Climbing out of the drainage. Photo by Mike Scussel
After the last obstacle we reached a large plateau surrounded by gigantic cliffs. The views were spectacular. For the first time since early day one, we were on an actual trail, and made good time. Not that I necessarily wanted to hurry. The views were so amazing that I would have been content camping right there, it was that beautiful. When I hike or backpack, I usually take my time to just soak in the wonder of it all... But we had a 10 mile day, including a twenty-foot rappel. We had to move.
The plateau on day 3. Photo by Mike Scussel.
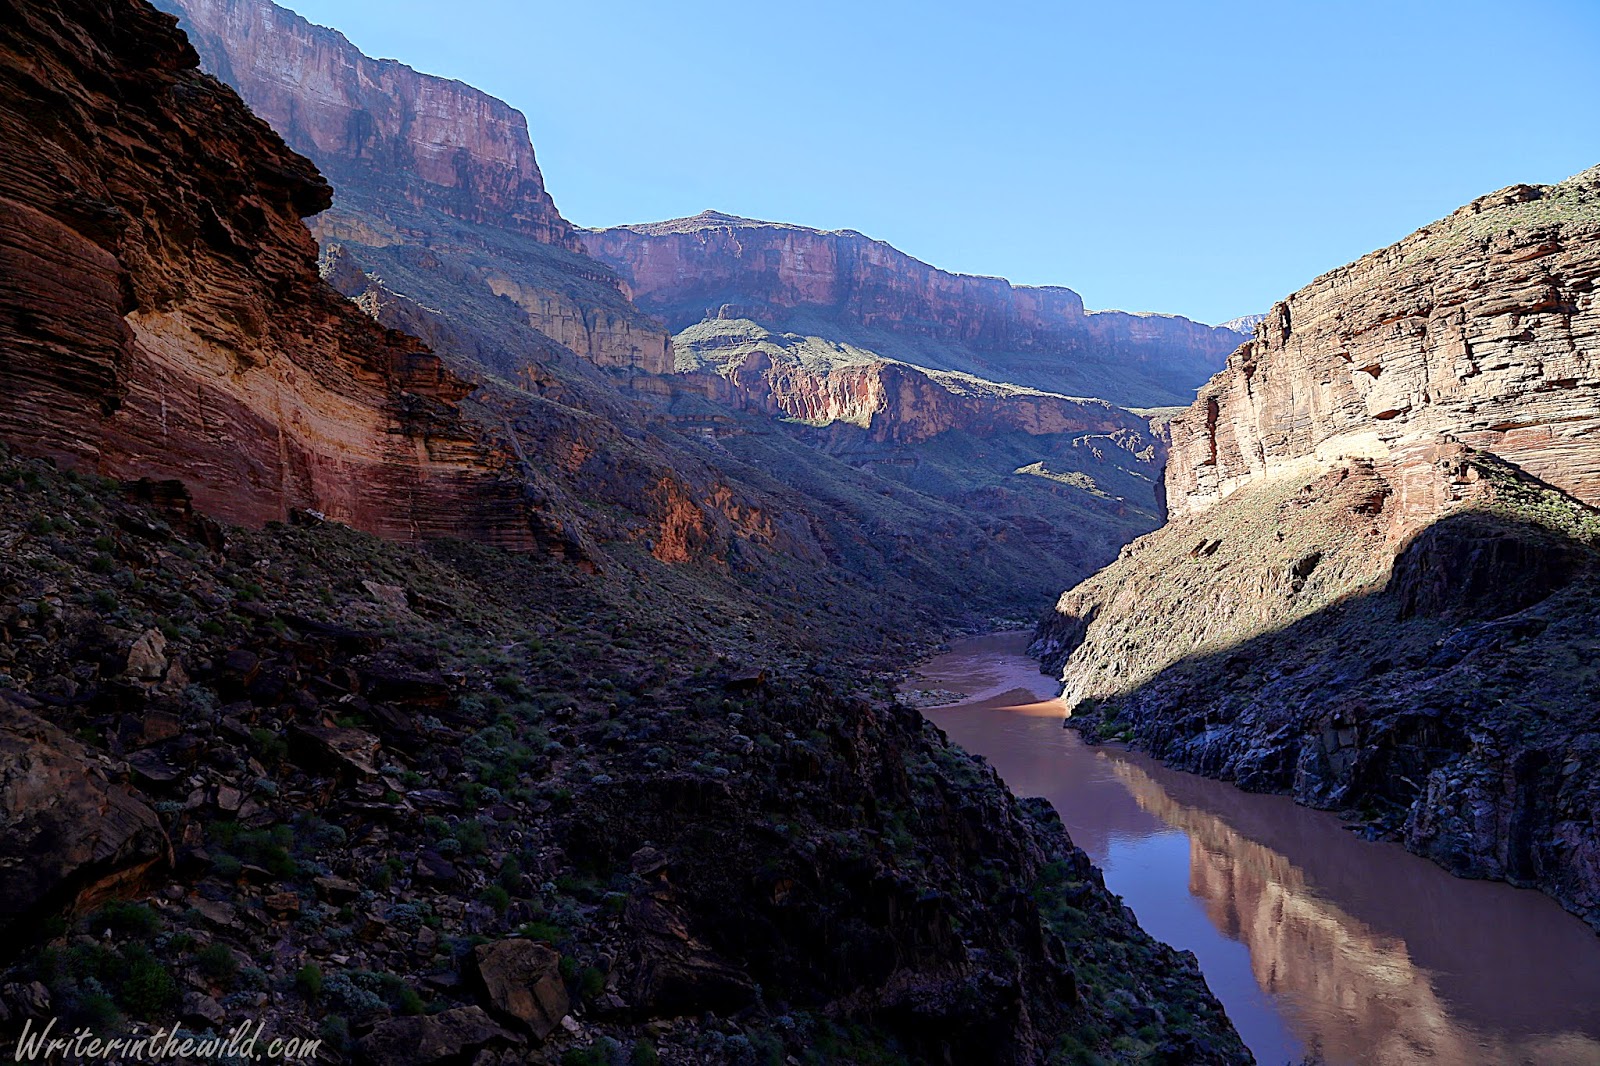
We got out first excited glimpse of the Colorado River far below. I kept thinking that it looked like a chocolate river out of Willy Wonka it was so brown. As the miles ticked by the terrain got steeper. The trail paralleled the edge of the canyon, and we were forced to walk precariously close to it most of the day. Sometimes the trail would put us right on the edge. I'm not afraid of heights, but we were so high and so exposed that I couldn't help but feel that rumble in my guts every time I peeked over the edge.
Hiking exposed on day 3. Photo by Bob Cagle
Our destination that day was Toltec Beach. The problem was that the trail didn't actually go to Toltec Beach due to a cliff in the way. The only way to reach it is by a twenty foot rappel. For me, this rappel caused more pre-hike apprehension than even the Ledge of Death. Mainly due to the fact that I had never repelled in my life, and I would have to rely on someone else for the equipment and expertise. The sight of the rappel was a narrow ledge that jutted maybe 5 feet out from the cliff-wall. We all removed our packs and sat with our backs against the cliff while Mike rigged the rope. My original plan at this moment was to volunteer to go first so I could get it over with, but Bob beat me to it. From our position on the cliff we were closer than ever to the river, and watched rafters float by as we waited. Out of the group of 5, 3 of us had never rappelled, and I think it's fair to say that we were all nervous... But it was a good kind of nervousness. An excited nervousness. Finally the rope was rigged and Bob took the plunge. We watched tensely as he leaned all his weight on the rope and harness and backed down the cliff. After he reached the bottom Mike looked over at me with a big smile on his face and goes, "Yes! That was my first time ever setting up a rappel by myself." I looked at him and said, "Dude, couldn't you have waited until I was at the bottom before you told me that?" It was all in jest because by then Mike had definitely earned my trust. Besides, seeing Bob make it to the bottom helped to settle me some. After a crash course in Rappelling 101, it was my turn. I think the hardest part for me was just trusting the equipment. Once I realized that the gear would support my weight the descent was easy. The entire time down I kept thinking about how much fun rappelling was, and when It was over I wished that it wasn't.
Video Below: My first ever rappel.
After we made it down safely, it was just a short jaunt to the beach where we would make camp. At the beach we ran into a couple hikers. It was the first people we had seen in 3 days. As much as we all wanted to make camp and relax, our day wasn't yet done. We still had a 3 mile round-trip to make if we wanted to see Elves Chasm. The hike to Elves Chasm was actually the toughest we'd done all day, and when we arrived I was totally pooped. Elves Chasm is a beautiful little waterfall and swimming hole carved right out of the sandstone. I took my shoes off and just let my sore feet soak in the cool water.
Mike and I at Elves Chasm. Photo by Bob Cagle
Back at the beach we sat around laughing and joking about the day we had. I think all of us felt a real sense of accomplishment even though we still had 2 days to go. I fell asleep knowing that from then on the route would be all uphill. Working full-time, going to school full-time and still making time for family didn't leave me a lot of time to train. I knew from the start that climbing out of the canyon would be my greatest challenge.
Leaving the river behind. Photo by Bob Cagle.
Leaving The Colorado River behind was bittersweet. It took so much hard work to get there that it felt like we should stay longer. But we had a schedule to keep. Before we left we topped off on water. Our destination at Copper Canyon was ten miles away, and there would be no water sources in between. We weren't even sure if we would find water at all once we got there. The day's hike was a moderate climb packed full of views. It was our first day without any scrambling, and it gave me time to enjoy the never-ending views and contemplate the amazing landscape I was in. I kept thinking that it was no wonder I had never seen any Discovery Channel survival show on location in The Grand Canyon. It's just too extreme. Looking around I wondered what it would take to survive there: treacherous terrain, scant shade, little water (except at the river), and barely any game or wild edibles. I couldn't help but feel respect and admiration for the native peoples that lived down there and even the first whites to explore it. The Grand Canyon is without question the most hostile place I've ever been.
Having fun at Copper Canyon camp. Photo by Bob Cagle.
We reached a bone-dry Copper Canyon late in the afternoon. We were nearly out of water, and the water we were hoping to find did not exist. We fanned out to search the 3 or 4 small drainages that fed Copper Canyon hoping to find something drinkable. Thankfully Mike found 2 large puddles about a half-mile up from our camp in one of the drainages. The day before, Mike's MSR Miniworks water filter completely failed, and David's Steripen was working only intermittently. Chris hadn't brought a filter and was completely relying on us for drinking water. Luckily I had a Sawyer Mini and Bob had a Sawyer Squeeze. What I love about Sawyer filters is the simplicity. There are no moving parts or complicated electronics. There is nothing to fail.
Chris and I. Photo by Mike Scussel.
The hike out was a bitch, at least for me. My stomach still bothered me from the day before. The terrain was steep, and it seemed like no matter how much progress I made I wasn't getting any closer to the top. The day was a blur as I spent most of it just watching my feet, too tired to pay attention to any views. About 3/4 of the way to the top I had just a couple ounces of water left and was on the verge of upchucking. Chris ran ahead (despite his bum knee) and alerted Bob (who had already finished) who brought me down some more water. After a good 20 minute rest, I powered on out. I was glad the climb was over.
Climbing out. Photo by Bob Cagle.
The Grand Canyon is an extreme place. I know I've mentioned that before in this trip report, but it's so true. It's something you can't quite understand until you've been there. If you ever get a chance to go, do it. Just make sure you're prepared. Any mistake in the canyon can quickly lead to disaster, especially if you aren't on the more popular corridor trails. Overall our trip was awesome. Everyone had blast even though it took us some time to recuperate. Thanks for reading.
"Death is a real possibility on this trip." - Mike Scussel (trip leader)
"...this hike offers about a million ways to get into serious trouble in a remote part of the Grand Canyon." - National Park Service
Descent into the Grand Canyon. Photo By Bob Cagle
Other than from the window of a passenger plane, I had never seen The Grand Canyon before. I didn't comprehend its scope or power. I didn't understand what I was getting myself into when I agreed to go. Even though The Royal Arch Loop was listed as "extremely difficult" in a canyoneering book I'd read, and even though The National Park's Grand Canyon website recommended experienced grand canyoneers only, I still didn't quite get it. For me, trips always seem to come down to one thing: Can I deal with whatever nature throws my way? Can I endure?
After a chilly night on the South Rim illegally camped next to a horse corral, we made the bumpy drive through Indian land to the South Bass Trailhead. We drove alone through the rugged high-desert country that marks this area, encountering only the bedraggled Havasupai who charged us $25 to pass through the reservation. A fee we would have swallowed easier if the rut-filled boulder-strewn road had been a little better maintained. At the trailhead we met a group coming out; two guides and a contingent of European tourists. Water was scarce they said. The five of us had brought enough containers to carry 2 gallons of water each, and the guides had plenty of water leftover after their climb out, so we topped off. It was a good thing we did.
My first thought after looking into the immense canyon from the south rim was one of skepticism. "I am going in there?" I asked my self incredulously. As infinite as it appears from the top, you really don't get a true sense of the scope until you are inside. It could have been the surface of Mars it felt so foreign; An endless maze of cliffs, and rock - and more rock. The descent was deceptively easy, because eventually I knew I would have to return the way I came.
Our fearless leader Mike Scussel
When we reached the esplanade my spirits were high; We were cruising, and the scenery was amazing, but as we dropped into the Royal Arch drainage the terrain changed. The trail was steep, and the soil loose underfoot. The way became difficult to discern, and route finding took more time. I slipped and fell, and when I reached out to stop myself from sliding down the embankment a sharp stone pierced the palm of my hand. It was the first of many small cuts and scratches I would get during the trip.
Getting Deeper. Photo by Bob Cagle.
We reached our campsite on a ledge near the mouth of the Royal Arch Drainage just before dark. Other than a small puddle, there was no water to be found. Our trip leader Mike decided to follow the drainage down in an attempt to find some water we had spotted from higher-up earlier in the day. We were all running low. He came limping back and cussing like a sailor. He had stepped in an agave, and the knife-like leaf had pierced about an inch-or-so into his calf. It wasn't a straight-in shot, but it looked painful. He treated it the best he could, and hoped aloud that it wouldn't get infected. In the meantime, I treated water from the small hole near our campsite. It contained about 2 gallons, but was so shallow it was difficult to extract.
First night's camp. Photo by Bob Cagle
That night the stars were incredible. We all noted how quiet the canyon was. It was something we all commented on during the course of the 5-day trip... The silence. In fact, The Grand Canyon is the quietest place I've ever been to in my life. At least in the area we were, which is much more remote and less traveled than the corridor trails in the more popular areas of the park. Here there were no mules, no tourists, no helicopters... Just nature.
I thought for-sure I would sleep well that night after such a hard day, but the wind picked up just before midnight and ruined my plans. Blowing sand and dust blasted me in the face. It didn't matter which way I turned. The sand covered my sleeping bag, and even got into my eyes and mouth. Finally I cinched my hood up so tight that I just left a small hole to breath from. It worked well enough that I finally fell asleep.
First night's water.
The next morning we cleaned as much sand off our gear and our bodies as we could. Not only did I wake up with grits in my mouth, but it was inside my sleeping bag and every other crack and crevice imaginable. Mike's leg was still hurting him, but he decided to soldier on. I felt bad that he was in pain, but I also did not want to turn around. It was only the second day! We were all eager to see the famed Royal Arch, but to do so meant a hard day of scrambling and climbing down the drainage.
A half-a-mile down we found the water we spied the day before: 3 large potholes filled to the brim with crystal-clear water. The discovery was just in time, as I had maybe half-a-liter remaining. Our progress was slow going. We squirmed and wiggled and slid down car-sized boulders on our butts. I think every one of us ripped a hole in the ass of our pants during the course of the day, but we didn't really care. We were having a blast.
Descending through the Royal Arch drainage. Photo by Bob Cagle
We eventually reached a huge dry-fall, which looked somewhere in the neighborhood of one-hundred feet, that dropped into a giant gorge with sheer cliffs on both sides. We knew we were nearing the infamous ledge of death, but Mike couldn't remember the route (it had been a few years since he had done this hike). Bob eventually spotted a faint trail leading up the cliff-wall to the right, and we all followed, except Mike who was still vigorously contemplating which route to take. My heart was beating like a machinegun as I climbed. Any slip would have meant certain death. At one safe point I turned around to check Mike's progress, but I couldn't find him. I began calling out his name. When he finally yelled back I spotted him across the gorge traversing a narrow ledge on a near vertical cliff. He had spotted the correct route, which was along the left wall, but the rest of us were too committed to turn back.
Video below: After reaching the dry-fall, Mike is deciding which way to go. The rest of us began traversing the cliff on the right, while Mike eventually took the cliff on the left:
Watching Mike traverse that ledge from across the gorge was the scariest moment of my hike. One mistake and he would have fallen to his death. Not that our situation on the right was any different, but being in a group gave me at least some sense of a safety net. With baited breath we watched Mike traverse the ledge. He eventually reached The Ledge of Death, which is a spot on the ledge where a fallen boulder has completely blocked the route. In order to pass it, Mike had to hold on the top of the boulder and squirm around the outside leaving his body literally hanging over the abyss. It was a tense moment for us four watching from across the canyon. The cliff was so huge, and Mike looked like an ant from our vantage point. But to our relief he made it, and when he reached a safe spot, he then watched our descent on the other side.
Looking across the gorge just after the Ledge of Death. You can see Mike standing on the ledge in the center of the pic. Photo by Bob Cagle.
We had to descend because the route across became impassable. Mike shouted over to us the route down that appeared the safest. We took our packs off, and with Bob leading the way, down-climbed between cracks in the cliff and over ledges and boulders, passing our packs down as we progressed. It was nerve wrecking because one slip-up would have been catastrophic. When we finally reached the slope at the base of the cliff, I was relieved but exhilarated by what we had just accomplished.
We descended to the slope from the top using the cracks in the cliff wall. I've dubbed this section "The Ledge of Doom". Photo by Bob Cagle.
David prepares for the last obstacle before the slope below the ledge of doom.
Our reunion with Mike back in the drainage was all smiles. We had conquered the most dangerous section of the hike, and we were all alive. The day wasn't yet done however, and soon we were back to sliding and scrambling. There were still plenty of dangers to go around. The largest hazard was falling, as it seemed like we encountered one obstacle after the next. But we got good at it, and worked as a team to negotiate the most difficult sections. By the time we reached Royal Arch we had hiked all day long, but covered less than 5 miles.
Royal Arch. Photo by Bob Cagle.
Royal Arch is the largest natural bridge in Grand Canyon National Park and it is spectacular. Just as incredible is a huge rock pillar that stands just past the bridge that looked like a wizard's tower from Lord of the Rings. The arch is an oasis in the desert, as water flows freely, and pools are deep enough to swim in. It was a welcome sight after the day we had. A couple of the guys jumped in the icy water for a bath, but for me it was time to just relax and contemplate what we had accomplished in just 2 days. By that second night, this trip was already the most difficult hike I'd ever done, certainly in terms of the danger involved, but also because the amount of off-trail travel. The route finding was constant. Every new obstacle made us pause to consider the best way forward, Sometimes there were rock cairns, left by hikers before us, but mostly it was a matter of taking a few minutes to look. I had not experienced a day like that before.
Tower near Royal Arch. Photo by Bob Cagle.
Billions of stars dotted the night sky. More stars than I'd ever seen since moving to Arizona. I was glad that I wasn't in a tent. Part of sleeping outside is just being outside, and we cheat ourselves out of that experience sometimes by sleeping in tents when we don't have to. Although all the climbing and boulder-hoping was engaging, I was looking forward to putting in miles on an actual trail. We still had 3 more days in the canyon, and I was already having the time of my life.
I've been given the opportunity to write some gear reviews from a company out of Russia called Red Fox. They make backpacking and mountaineering equipment, and their store features a wide variety of packs, tents, and down products. They are still fairly new to the U.S. market and their English language North America website is a work in progress. Anyway, just as an introduction I found a really cool news story from The Salt Lake Tribune that goes over Red Fox, their history, equipment, and some of what they hope to accomplish in the United States. I'm really excited to be reviewing some of their gear. I got some today and already climbed a mountain with it, and I was definitely impressed. So, look out for my future gear reviews, and give Red Fox's website a looksee.
Website (you'll need to use the "translate" feature on your browser... Unless you speak Russian.)
"Rain gear may have missed the final cut on the Mountaineer’s list of Ten Essentials, but that doesn't mean you shouldn't always carry some with you. I never venture out into the wild without at least a rain jacket. I've been down misery road too many times before. I remember once in the Blue Mountains trying to sleep in a wet sleeping bag. I tossed and turned and shivered. I prayed for morning to hurry its arrival. Another time backpacking in Glacier National Park I skipped the rain pants to save a little weight. Sure enough an arctic storm blew in, and for three days straight I was dumped on. My rain jacket kept my upper body dry, but my legs were constantly soaked. I learned the hard way that staying dry is important even if it means carrying a little bit extra."
Purinize Water Purifier Solution is an all-natural water purifier using an “all mineral salt solution”. What makes this product unique among water purifiers is the ingredients, which are simply 2% sulfate mineral salts; 98% purified water. When I first received this product and read that suspect ingredient list, my first question was: How does that work? Before I even began testing this stuff, I had to do my research. The answers I found are a bit murky.
According to Purinize, water purification occurs in a four step process.
1. FLOCCULATION. when Purinize is added to water, it causes dissolved, invisible impurities, like dirt, organic waste, and micro-organisms to come out of suspension and agglutinate or clump together.
2. AGGLUTINATION: The process of agglutination (clumping) occurs where impurities are neutralized as they clump together becoming insoluble.
3. PRECIPITATION: Once agglutinated, the insoluble, neutralized impurities solidify as they precipitate out of solution becoming filterable.
4. DEPOSITION: The precipitates settle, becoming sediment at the bottom of your water container. At this point your can either, filter and/or scoop, or pour the purified water.
If you read those steps closely, you might take away two key points. The first is that water is purified by clumping the impurities together so that they “become filterable”. The second is that the clumped impurities become “neutralized“, and settle as sediment at the bottom of your container”. The trick is then separating the sediment from the water, which Purinize recommends using a .1 micron or smaller filter. Indeed, my small 2 oz. bottle of Purinize was sent to me with a Sawyer Mini Water Filter for this purpose. But I couldn't help but wonder: If I had a filter, why would I need Purinize?
The top water filters sold for backcountry use in the United States are perfectly adequate for removing any harmful bacteria one might encounter in North America. Hikers have used filters like the trusty Katadyn Hiker Pro for years. As great as filters are however, they do not actually purify water. Let me repeat that just in case you think I made a typo. Water filters do not purify water. To do so, they would also need to filter out viruses, which are just too miniscule for nearly all filters. That is where a water purifier comes in. Any product claiming to “purify” water, must “destroy 99.9999% of bacteria, 99.99% of viruses and 99.9% of protozoa”.
Purinize posts the results of independent lab testing on their website to validate their purification claims. They list a whole host of waterborne pathogens it eliminates or reduces, including some viruses. Incredibly, it also claims to be 99.95% effective at reducing chemicals, pesticides, pharmaceuticals, disinfectants, and heavy metals. The problem with the lab testing however is that “all tests were conducted using a 0.2 micron” filter. I say “problem” because a .2 micron filter would reduce many of the pathogens, pesticides, and chemicals on its own.
Now we reach the crux of my problem. How do I safely test a water purifier whose effectiveness I am not convinced of, and whose failure may seriously impact my physical wellbeing? The answer, of course, was to follow the instructions sent to me by Purinize to the letter.
For my testing, I always paired the Purinize with a filter. I just couldn't get over the fact that the lab tests were also done with a filter. On their website, Purinize claims that it “will disinfect and clarify virtually any fresh water source within minutes…” All you have to do is “add the suggested amount of Purinize to your water. Mix well and wait a few minutes before consumption.” They do recommend however that a filter be used before drinking for the “removal of agglutinated particulates.” So that is what I did. I never tested this product alone without a filter.
I tested Purinize on a variety of water sources. My first test was at a Willow Springs Lake on the Mogollon Rim in Arizona. The lake was very low and extremely muddy due to persistent drought conditions in the region. For this first test, I involved the entire family. I treated a gallon of lake water with Purinize, waited about 10 minutes, and filtered with a Katadyn Hiker Pro. The end result was crystal clear water that tasted pretty good. I shared the water with my family, mainly because of the trust I had with the Katadyn Hiker Pro. All of them agreed the water was good. We all drank plenty and none of us got sick. The test results however were inconclusive, because using the Katadyn Hiker Pro would have made the water safe anyway.
Taking the advice of Purinize, I decided to treat a bottle of tap water, and leave it overnight. To treat, you simply add 15 drops per liter of water. After 24 hours I checked on my bottle of water, and sure enough, at the bottom was a pile of clumped impurities that sort of resembled a yellow goop. When I drank the water (with a filter) I didn't notice any discernable difference in the taste. I tried this same experiment with several water sources, all with the same result. Perhaps the most revealing test I conducted was with green algae-filled swimming pool water. After waiting 24 hours the green water was crystal clear, except for the yellow goop floating around near the bottom. Admittedly, I was a bit hesitant drinking this water because of its original appearance, but using a Sawyer filter, it tasted fine and I didn't get sick.
Purinize is a tough nut to crack for a gear tester. Although I can physically see sediment clump together and sink to the bottom, I don’t know for certain if the water itself is actually purified because I lack a proper laboratory and the scientific knowhow. Since all the treated water is ran through a filter, it’s tough to tell which method is making the water safe to drink; the Purinize, or the filter? The only way to find that out, is to just use Purinize alone (and skip the filter) on water I know will contain pathogens or chemicals that will make me sick. But I’m just too scared to try.
My conclusion is that Purinize would be an unnecessary redundancy for backpacking use in North America. If you are overly concerned about a particular water source I would consider Purinize as a pre-filter treatment option. The best use for Purinize in my view is for emergency water treatment or long term water storage in an “off the grid” scenario. If you are collecting water for storage purposes from potentially unsafe sources, I can see Purinize working well to clump possible impurities together in storage to assist in the filtration process later on. Furthermore, lacking any expiration date, Purinize could benefit from a long shelf life as long as it’s properly stored. This shelf life makes Purinize an option for preparing for future fresh water shortages due to a rising population, global warming, and man-made pollutants.
Disclosure of Material Connection: I received a 2 oz. bottle of Purinize Water Purification for free from Purinize Advanced Water Technologies as coordinated by Deep Creek Public Relations in consideration for review publication.


.jpg "REI Flash 18")